
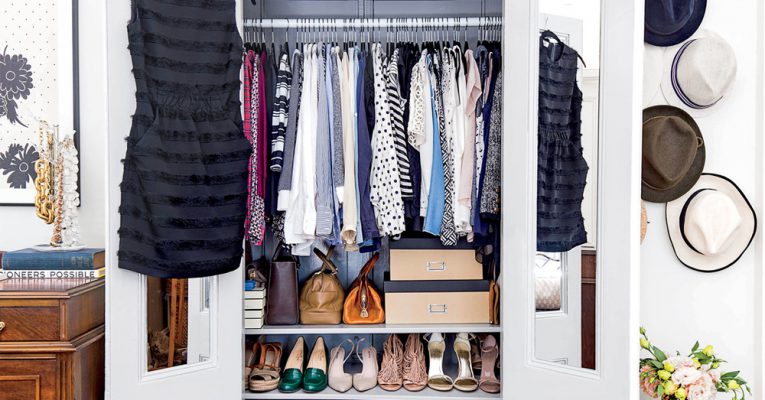
How to Care for Everything in Your Closet
June 10, 2019
Guest blog by Kacey Mya, the blogger behind The Drifter Collective
Whether you hate shopping or you’re already on your way to the mall, you probably spend a decent chunk of money buying clothes. In 2012, the average American family spent $1,736 on apparel like shirts, pants, shoes and much more.
An investment that significant deserves care. Learn how to take care of your clothing so you can extend their use and save money.
Jeans
Until the early 1970s, all jeans were made of raw denim, which you shouldn’t wash for at least six months. It takes time for the material to break in and properly conform to your body. If you wash too soon, you’ll lose the shape.
Today, most jeans are pre-washed, meaning they can handle more wear and tear. But you still shouldn’t wash after each use. When washing is necessary, turn the jeans inside out and choose a delicate cycle. While machine drying is not ideal, if you must, use the lowest temperature setting.
Swimwear
When you finish swimming or lounging in the sun, you should rinse your swimsuit with clean, cool water to remove any dirt or sweat. Like most clothing, you don’t have to wash swimwear after each use.
Though we’ve all been guilty, you shouldn’t put your bathing suit out in the sun to dry. Doing so causes the fabric to wear down and fade. If possible, dry your suit indoors or in the shade. A couple of times a year, like at the end of summer, you should wash your swimsuit by hand in the sink, using about a teaspoon of detergent.
Formal Wear
Formal wear is delicate, and you should only wash it when needed, not after each use. Dry cleaning, which presses 500 degrees of heat on the garment, can cause even the best suits to lose shape and break down, especially over repeated visits.
When they are not in use, always hang your suits on a sturdy, wooden hanger. Leaving them lying around leads to excessive wrinkling. You should also keep the jacket and pants together, even when hanging, to ensure they receive the same amount of wear and continue to match.
Lingerie
Materials used to make lingerie — like silk, which comes from silkworm cocoons — is thin and gauzy, and can suffer damage when tossed in the washing machine. Always hand-wash with a small amount of detergent, being sure to separate lights and darks to prevent bleeding, especially with hand-dyed garments. Avoid the dryer and lay each item flat on a towel to dry.
For bras and camisoles, keep them folded in drawers to help maintain shape and cup size. You should also rotate your bras, as they need 24 hours after wear to regain their shape.
Shoes
If you like to work out, even if it’s just a walk around the block, sprinkle a few teaspoons of baking soda in each shoe to absorb odors and moisture. Regular exercisers should replace athletic shoes at least every six months.
If the fabric of your shoes gets dirty and needs cleaning, mix a small amount of detergent with warm water, creating a heavily diluted solution. Use a soft towel to blot at the stains, removing as much dirt and detergent as possible. If necessary, you can also take out the laces and massage them with soap before rinsing them and placing them flat to dry.
Blankets
When washing blankets, be careful not to overuse detergent, which can cause residue to stick in the fibers, preventing it from fluffing up. If your blanket is extra dirty, stop the machine mid-wash and let it soak for an hour or so. To ensure all the soap gets rinsed out, run the blanket through a second wash cycle with just water.
With blankets, drying is a slow process because you can’t crank up the heat. High temperatures cause wear and tear, especially to blankets filled with down. Use low heat and, if your items are still damp after one cycle, turn the timer on again for another round.
How to Take Care of Your Clothing
Your clothing won’t last forever. In order to keep your clothing fresh and wrinkle-free, check out this guide from the unclutterer on the best clothes steamers that are known for removing bacteria, odors, and creases from clothing. After years of use, shirts fade, pants get stained and fabric rips. But you can get the most out of your clothes — and your budget — by caring for them properly. Follow the instructions above to learn how to care for each item in your closet.
Subscribe to the Organize-It blog for more organization tips and tricks. Learn more at Organize-It.com
5 Cheap Ways to Maximize Closet Space
June 5, 2019
Organizing your closet doesn’t have to cost an arm and a leg. Read on to discoverer inexpensive ways to make a big impact in your space.
1. Shelf Dividers – Starting at $2.99

Add shelf dividers to the shelf above your closet rod to keep it neat and tidy. Shelf dividers help keep stacks of jeans, bed sheets, and other items neatly stored and separated. Organize-It offers shelf dividers to work with both wire or solid shelving, so you have no excuse for not organizing your shelf!
2. Clothes Hangers – Starting at $.99

Clothes hangers are often forgotten, yet they are perhaps the most important aspect to closet storage. You need standard plastic or velvet hangers of course. These are essential for the bulk of your clothing storage.
Specialty hangers allow you to hang up clothing accessories such as ties, belts, and scarves. This keeps everything you need stored right alongside your clothes.
Tiered hangers are a must have for your closet space. These clothes hangers allow you to store a handful of garments on one hanger by using vertical space. Tiered hangers are designed to store blouses, slacks, tank tops, camisoles, and even lingerie!
Need even more storage space? The Black Magic Hanger Holder is designed to store multiple clothes hangers vertically, which allows you to maximize the storage potential of your closet without stretching the budget.
3. Closet Valets – Starting at $5.99

Do you have a bare wall in your closet or bedroom? Closet valets are an inexpensive way to add temporary hanging space for clothes. Hanger holders make it easy to set out an outfit for the next day, hang up clothes while you’re sorting laundry, and so much more.
Add the same storage space to your closet with wall hooks. Wall-mounted hooks are a simple way to add style to your closet by giving your space a different, and sometimes unique, look. Add wall hooks to the closet, bedroom, bathroom, and elsewhere in your home to store bathrobes, jackets, and more.
4. Another Closet Rod – Starting at $3 per foot

You can never get enough hanging space in your closet. One way to double the available space in your closet is by adding another closet rod. Depending on the size of your closet and which finishes you choose, you can install a permanent closet rod for under $30.
Instantly double the space in your closet without taking on a major project with a closet doubler! This innovative product is designed to slide right onto your existing closet rod and hang down to serve as a second closet rod. This allows you to effectively double your closet space for a fraction of the price. You can add one to your space for under $15
5. Shoe Storage – Starting at $10.99
One of the most overlooked items in your closet is your shoes! Shoes have a tendency to clutter up your closet floor and ironically, get underfoot. Make sure you have a system to store your shoes and keep them neatly organized. Store dress shoes and other fancy footwear in shoe boxes to keep them tidy and safe from harm. Organize-it offers specially designed shoe boxes that are designed for men’s shoes, women’s shoes, and high boots.
Add a shoe rack below the closet rod to keep your everyday footwear neatly stored yet ready to wear. Organize-It offers several modular shoe racks that will fit neatly underneath a closet rod. If you have enough room in your closet or bedroom, a Floor to Ceiling Rotating Shoe Tree is perfect for keeping your shoes beautifully stored.
With just a few dollars, you can easily add organization to your bedroom closet! Organizing your space and your life starts with a single step, or in this case, a simple click of the mouse!
Subscribe to the Organize-It blog for more organization tips and tricks. Learn more at Organize-It.com
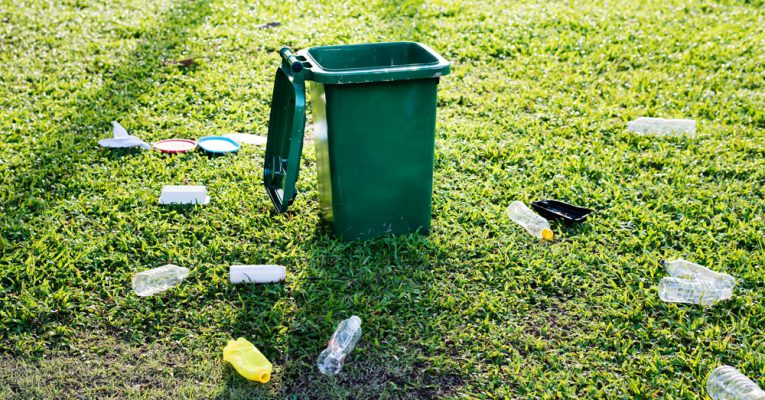
How to Organize Garbage and Recycling at Home
June 3, 2019
by Riya Sander
Recycling is not an easy endeavor to take, no one wants to spend hours memorizing recycling symbols or sorting metals, plastics, papers, glasses, batteries, and electronics – but it is absolutely necessary. After all, a zero-waste lifestyle is an excellent benefit for both your wallet and the environment.
Luckily, there are simple and easy ways for garbage segregation at home. They will help you establish a recycling system, which you can stick to without putting in too much effort. Read on to adopt and enjoy a greener life.
1. Accepted Garbage
Find out what your local recyclers rejects and accepts. Simply visit or call the Recycling Centre. Remember to set aside items like electronics as they require special treatment. Some curbside recycling programs won’t pick up E-waste as well as hazardous materials. Even though, several municipalities provide an annual drop-off program to accept such items.
The most common home waste removal programs are dual stream and single-stream recycling. The single-stream recycling program combines glass, metals, plastics, cardboard, and paper. Low-quality recycling, higher contamination, and collection costs are much lower on this program.
Dual stream recycling program separate recycling – you separate the materials yourself. The program has lower contamination, collected recyclables have low costs, high-quality recycling, and more recovery material.
If you want to recycle items like electronics, wood, bulbs, and batteries, consult with your local community or office on what recycling programs provide the recycling.

2. Study Your Garbage or Trash
Study your garbage, before you get the bins. That way, you will determine the size and type of bins or containers you will need. A family that drinks a lot of soda and juices will need a large bin for the bottles and cans.
Consider buying smaller bins in general. Smaller bins save space and they look great. However, if your recyclables are big like old sports, equipment, electronics, get big containers. Taller bins are also stylish and most have handles, you can easily carry heavy load or garbage inside.
3. Know Your Recyclables
Begin by learning your recyclables. Metals are among the most common recyclables – please understand what non-ferrous metals are – they are strong, they do not rust, and they can be sold for cash. Cardboards, glasses, plastics, wood, batteries, bulbs, and electronics are common recyclables as well.
Do not recycle crystal, window glass, mirror, contaminated glass with food waste, dirt, and stones, heat-resistant glass, ceramics, plastic or metal lids and caps, plastic or foam food containers, Styrofoam, and plastic produce and grocery sacks.
4. Have a Storage Space
Is there room in your pantry, mudroom, laundry room, utility closet, garage, or back porch? Or maybe a room for recycling bins in your kitchen, in a pull-out drawer or under a counter? Make sure to dedicate a space that is convenient for the garbage bins. Consider keeping the bins in a spot that is close to where you recycle.
Scattering the bins around your home will create a false sense of having too much garbage. Line them to optimize your space especially if you live in a small townhouse.

5. Bin Shopping
Use dedicated bins for your recycling and organize them by label or color. This way, you will make recycling accessible and easy for any member of your household. Also, develop a routine for recycling and emptying trash. Recycling is actually a simple chore, a kid over the age of 8 can do. If a child is involved, make sure there are no cans with sharp edges.
The number of bins you will get will depend on what you are planning to recycle and the type of program. Keep in mind that you will need non-recyclable garbage bins as well.
6. Prepare the Garbage
Prepare all garbage prior to recycling with your local recycling program guidelines. For instance, you can prep the metals cans like pop cans and soup cans by emptying and giving them a quick rinse. For the Coffee cups – First, separate the plastic lids, and then recycle them.
Unfortunately, most communities don’t accept stretch wrap, pasta bags, single-serving food wrappers, wrap from cheese or meat, and stand-up pouch bags. Also, if your local community recycling programs do not reject zipper bags, plastic bags, bread bags, shopping or grocery bags, dry cleaning bags, outer milk bags, frozen or fresh vegetable and fruit bags, packages of diapers, and sandwich bags – put all these unwanted stuff in one plastic bag and then tie shut.
We believe that this piece focusing on how to segregate garbage at home was helpful. Learn how to recycle items – common as well as the not-so-common. Also, be creative and proactive because not every garbage item will be accepted in your area. You can take the rejected recyclables to another city-run recycling center. Lastly, take pride in your determined attempt of trying to help the environment; enjoy your greener life.
Subscribe to the Organize-It blog for more organization tips and tricks. Learn more at Organize-It.com.